CRUD Pages
I had some trouble following the CRUD Page notes so I decided to basically rewrite them here after finishing that stuff.
Since this page is public, I won't be putting the actual IP address for the database, but it will be the same for everyone. It is in the original CRUD notes & you should have it in mysql anyway.
1. Create Project
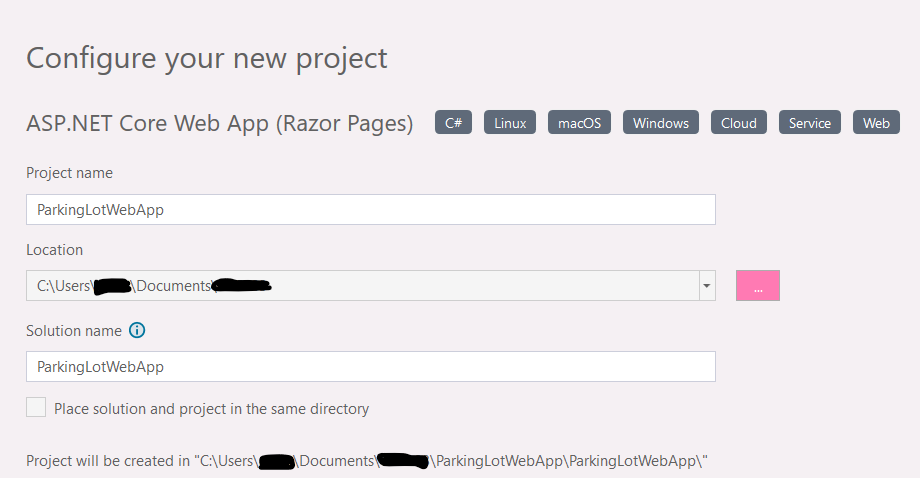
First, you want to just create the application using the VS template.
Open VS and click
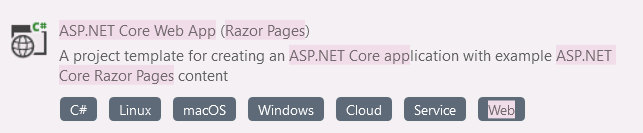
The template we want is
If you don't see this template, you may have to go back and install some extra things.
 It doesn't matter what you name/ where you safe the project. Just make sure it's something you'll understand & remember.
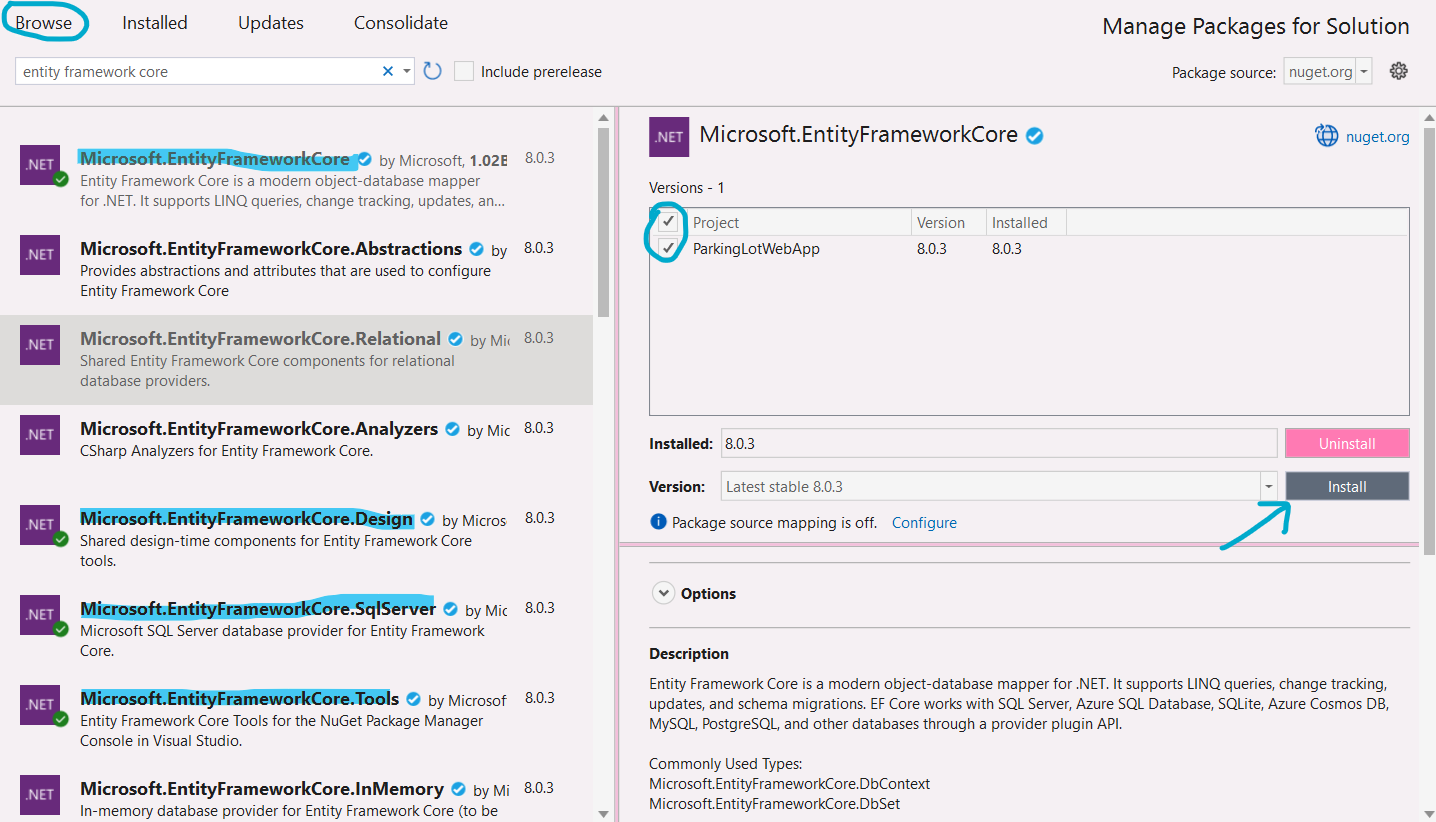
Now, we want to install the correct packages. On the toolbar, click 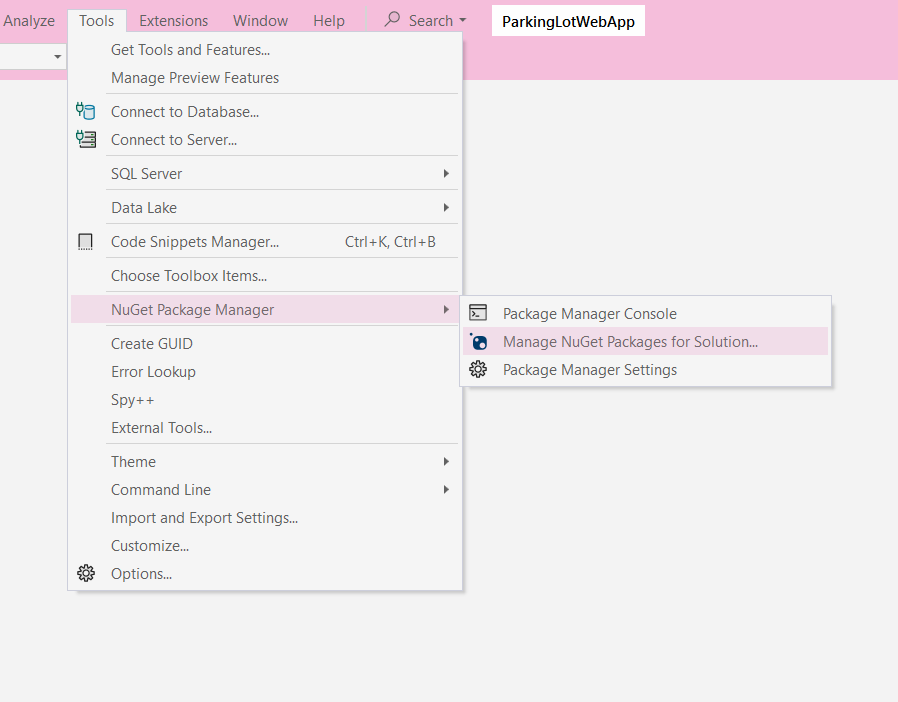
In the sidebar, click
- Microsoft.EntityFrameworkCore
- Microsoft.EntityFrameworkCore.Design
- Microsoft.EntityFrameworkCore.Tools
- Microsoft.EntityFrameworkCore.SqlServer
- Microsoft.VisualStudio.Web.CodeGeneration.EntityFrameworkCore

2. Connect Database
With the project set up, we can connect your database.
On the toolbar, click
You should see something labeled
This will bring up a popup. Fill it out as follows:
- Data Source: Microsoft SQL Server (SqlClient)
- Authentication: Sql Server Authentication
- Server name: [Server IP address]
- User name: SqlServer username (school email prefix)
- Password: SqlServer password (student id)
- Trust Server Certificate: [Check]
- Save my password: [Check]
- Select or enter a database name: name of your database in SqlServer
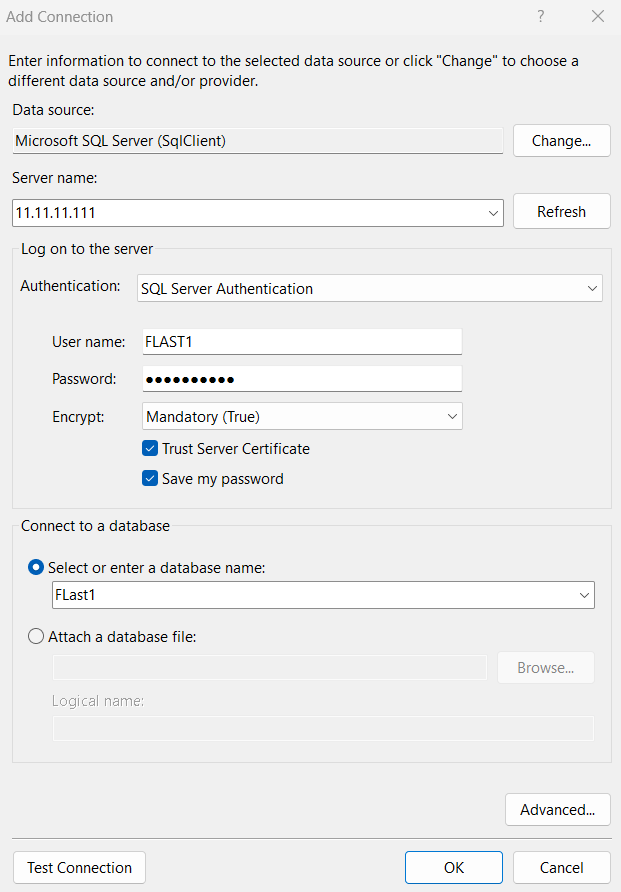
Click
Make sure that 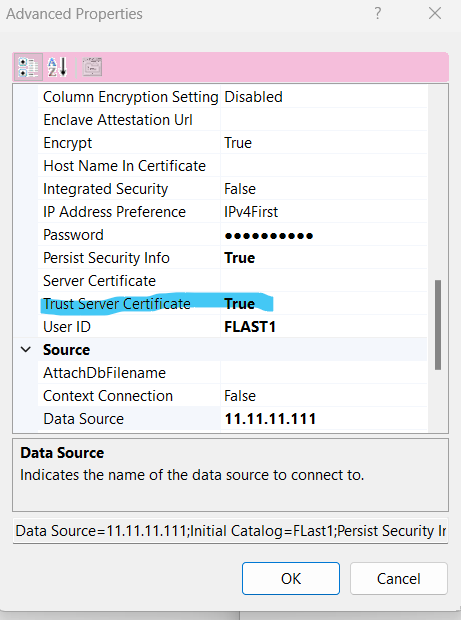
3. Create Context Files
Click
This will open up a terminal at the bottom of your screen. Copy and paste the following into the terminal, replacing the highlighted portions with your information.
Package Manager Console
Scaffold-DbContext 'Data Source=
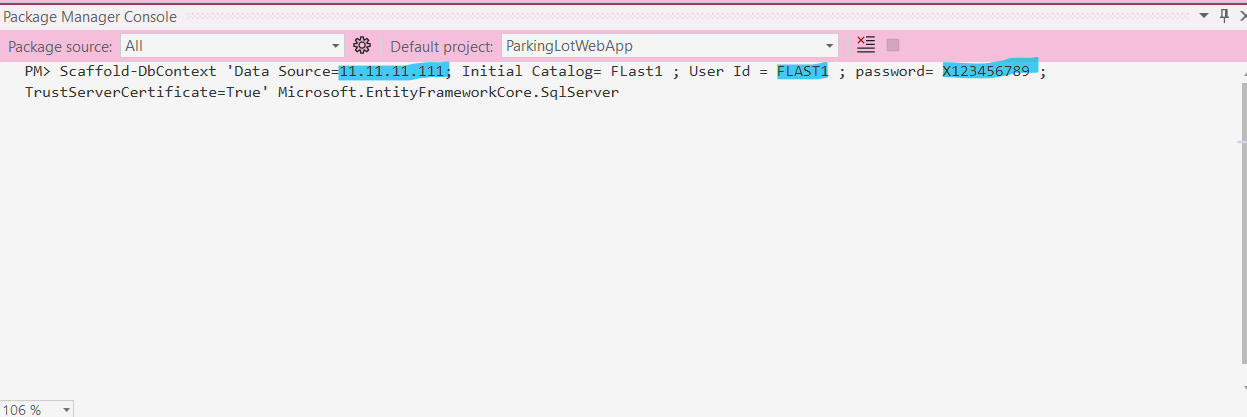
You should now see C# (.cs) files in the Solution Explorer for each of your tables, and one for the database.
4. Set Application Settings
The rest of this process involves editing files. I will include excerpts of the files to give you context for where to make edits. Existing code will be
First, we want to edit the settings in
Note: You can choose the connection name here.
appsettings.Development.json
"Logging": {
"Microsoft.AspNetCore": "Warning"
}
}
"ConnectionStrings": {
}
appsettings.json
"Logging": {
"Microsoft.AspNetCore": "Warning"
}
},
"AllowedHosts": "*"
"ConnectionStrings": {
}
As a reminder, you are using your SqlServer login credentials.
5. Modify Context File
Now, we want to edit thethe
You should see a file like
We want to make four changes...
- Add "using" satements
- Remove empty public contextname constructor
- Add public IConfiguration declaration
- Modify OnConfiguring function
yourDataBaseContext.cs
using System.Collections.Generic;
using Microsoft.EntityFrameworkCore;
using Microsoft.Extensions.Configuration;
namespace ParkingLotWebApp;
{public yourDataBaseContext()
{
}
public FLast1Context(DbContextOptions<yourDataBase> options)
{
}
public virtual DbSet
public virtual DbSet
public virtual DbSet
public IConfiguration myconfig { get;}
{
}
}
{
...
...
6. Modify Program.cs
For this sep you will need the name of the context.cs page we just modified in the previous step, and the name of your connection string created in part 4.
Open
Program.cs
using Microsoft.EntityFrameworkCore;
var builder = WebApplication.CreateBuilder(args);
// Add services to the container.
builder.Services.AddRazorPages();
builder.Services.AddDbContext
...
...
...
7. Make CRUD Pages
To make the CRUD pages, first make a folder for each table by right clicking
Drag each of the table cs files into their respective folders. Then, right click that folder and hit
A popup will open. Select 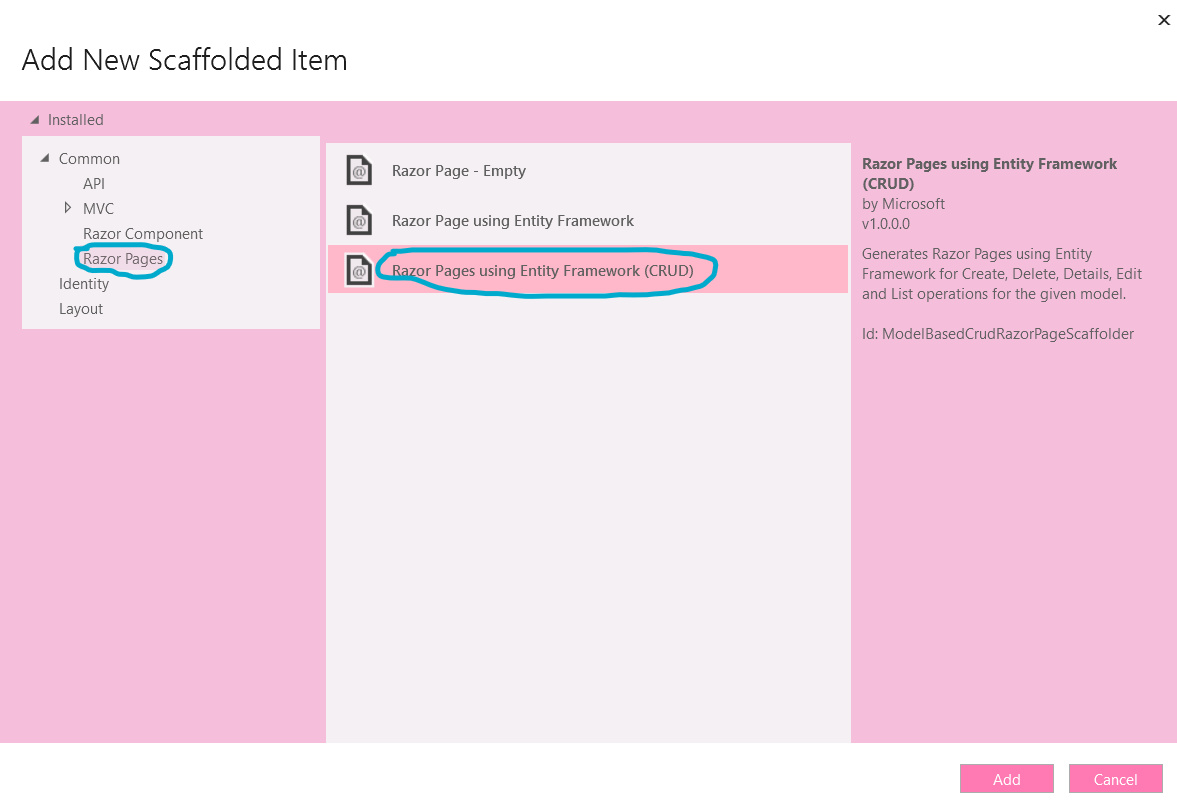
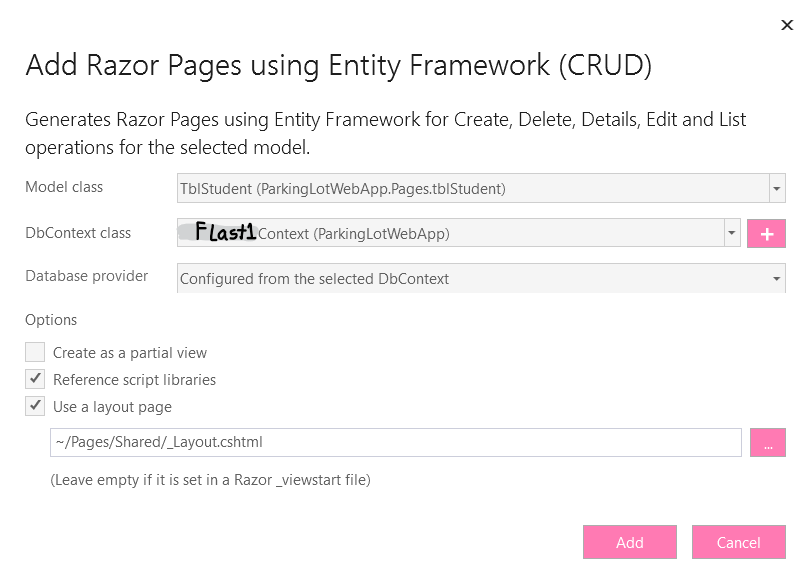
Fill out the next page with the following information:
- Model class: The current table
- DbContext class: yourDataBaseContext
- Use Layout Page: [Check] ~/Pages/Shared/_Layout.cshtml
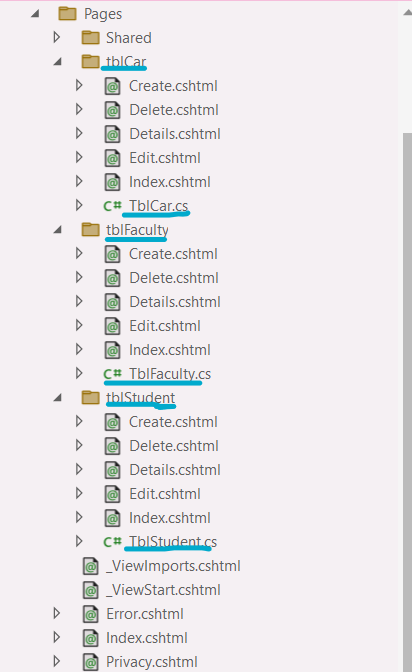
It will take a few moments to process, then it should look something like below once you've done this for all tables.
Remember to save all by clicking on the save all (double floppy disk) button.
Finally, test the CRUD pages by right clicking on